By the Fancy Comma, LLC Team
Adding a Table of Contents to your Microsoft Word file is easy, and eliminates the need to keep track of ever-changing page numbers. #writingtips #writingcommunity #fancycomma
Tweet

Regardless of whether you’re writing a term paper, scientific research article, or a book, you can use Microsoft Word to automatically generate a Table of Contents (TOC) that will evolve with your document.
Read on to learn more about how you can use your document’s headings — that is, section and subsection titles — to take advantage of this underutilized, yet powerful Microsoft Word feature.
How to Use Headings in Microsoft Word
The Heading styles are the most important formatting settings for creating a Table of Contents in Microsoft Word. You can find the Heading styles in the ‘Home’ toolbar:

In my version of Microsoft Word (Microsoft Office 2019), when I first open a document, only Headings 1 through 3 are listed, but as I use the Heading options, more headings — Headings 1 through 5 — become available:

What do these heading levels mean?
Heading 1 is used for the highest-level headings in your document, such as the title of the document.
Heading 2 is the second highest level of heading, and can be used for subsections of your document. Subheadings in these sections can be formatted with Heading 3.
Any headings beyond Heading 3 will not show up in the Table of Contents.
Make sure your document has properly-formatted headings so that titles and subtitles can be mapped to their appropriate page number in the Table of Contents.
Once you have created a document with titles for sections and subsections, follow these three simple steps to create a Table of Contents.
Create a Table of Contents in Microsoft Word Using Document Headings
Step 1: Use style settings to apply the proper heading properties to section and subsection titles in your document.
The first step to an automatically-numbered Table of Contents in Microsoft Word is to format section and subsection titles properly. Any text labeled as Heading 1, Heading 2, or Heading 3 will automatically appear in the Table of Contents.
Heading 1 supersedes Heading 2, which supersedes Heading 3, and so on. Lower heading settings, such as Heading 4 or Heading 5, are not included in the Table of Contents.
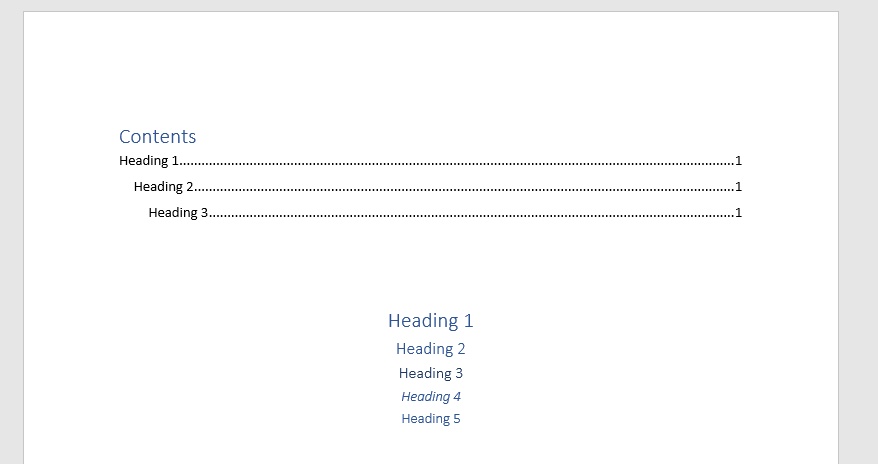
As you can see in the example above, Microsoft Word permits only Headings 1 through 3 to show up in the Table of Contents. While Headings 4 and 5 are included in the document, they do not appear in the TOC.
To apply a heading style to a heading, simply select the title text with your cursor, and click the appropriate style button — Heading 1, Heading 2, or Heading 3 — to apply the desired heading level.
Tip: Remember to only apply the style formatting to the heading, not the body of the text, as any text formatted as Headings 1, 2, or 3 will show up in the Table of Contents.
Step 2: Fix any text formatting issues created by Step 1.
Changing the style settings for headings can change their font and font color. You will need to go through manually to fix this.
If going through and reformatting text seems like too much of a pain, the good news is that there’s a better way. You can also customize your style settings to avoid going through and re-formatting everything. While this is more complicated, it will likely save you time in the long run.
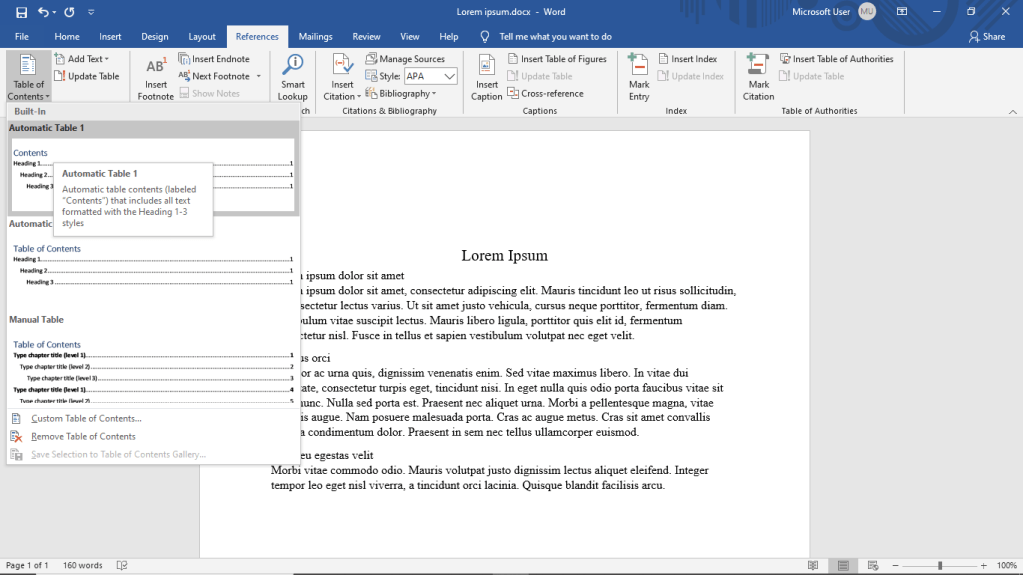
Step 3: Add the Table of Contents to Your Document.
Once you have all of the headings formatted properly, you are ready to add the Table of Contents. Simply go to References > Table of Contents and select your desired format for the Table of Contents.
Check out the following video for a quick walkthrough of all three steps above (for some reason, the TOC menu in the final step doesn’t show up, but that’s OK).
Updating the Table of Contents
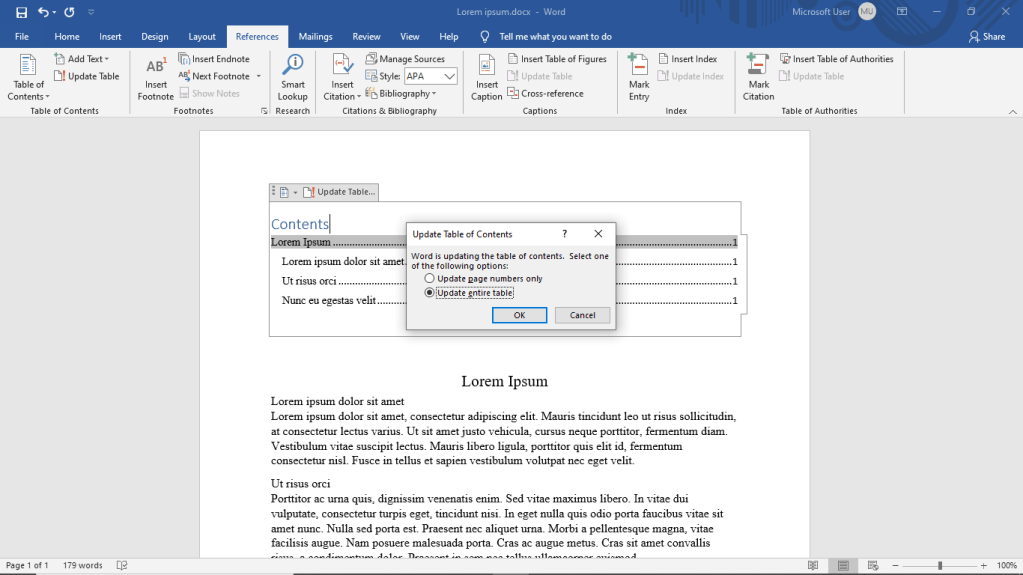
Keep in mind that though the Table of Contents automatically keeps track of page numbers for you, you will need to manually update it as you edit your document. This makes sure that the Table of Contents stays up-to-date. To update the Table of Contents, first click on it, select the option to “Update Table,” click “Update entire table,” then click OK.
Deleting the Table of Contents
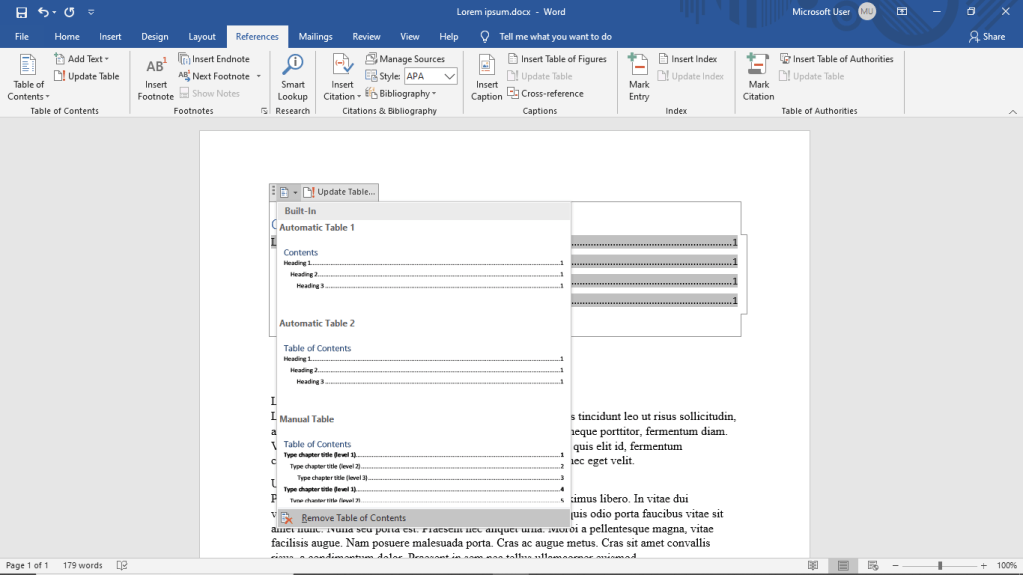
Once you add a Table of Contents to your document, you cannot use the delete key to get rid of it. Instead, click on the Table of Contents’ settings, and go to “Remove Table of Contents,” which is found at the very bottom of the menu.
While creating a Table of Contents takes a bit of time, it is a great way to improve the organization of your document. Learning how to create a table of contents in Microsoft Word, especially for longer documents, is well worth the time invested. With this built-in function, there’s no need to keep track of page numbers or section titles yourself — Microsoft Word does it all for you!
Visit the Fancy Comma, LLC blog to learn more of our best Microsoft Word tips and tricks.

One thought on “The Easiest Way to Create a Table of Contents in Microsoft Word”